

 www.walmart.com
 Introduction: Build Your Own Storage Cubes Tired of cluttered spaces? These DIY storage cubes offer a customizable and affordable solution to organize your home. This project is perfect for beginners and can be adapted to fit any room and storage needs. Follow these simple steps to create your own stylish and functional storage system.
Materials You'll Need:
- Plywood or MDF (1/2" or 3/4" thickness recommended)
- Wood glue
- Screws (1 1/4" or 1 5/8" depending on wood thickness)
- Wood filler (optional)
- Sandpaper (various grits, e.g., 120, 220)
- Paint, stain, or varnish (your choice of finish)
- Measuring tape
- Pencil
- Square
- Circular saw or table saw (for cutting the wood)
- Drill/Driver
- Clamps
- Safety glasses and ear protection
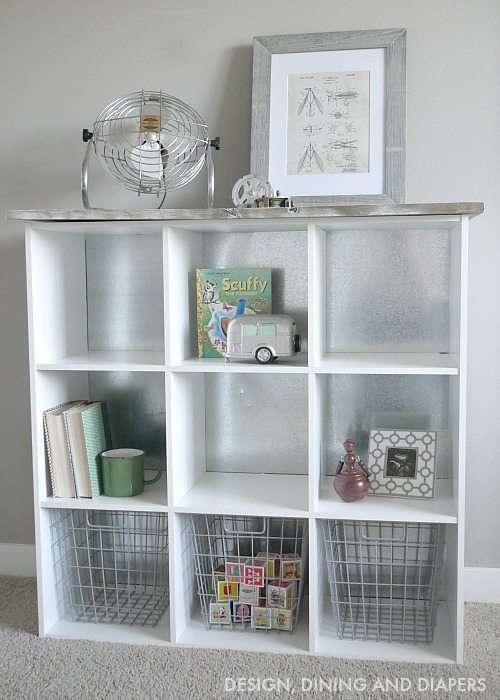
Step 1: Plan and Cut the Wood Measure the space where you plan to place the storage cubes to determine the desired dimensions for each cube. A common size is 13" x 13" x 13", but you can adjust it to fit your needs. Calculate the number of cubes you want to build. Once you have your dimensions, cut the plywood or MDF into the necessary pieces. Each cube requires six pieces: top, bottom, left side, right side, back, and front (optional). Ensure all cuts are square for a clean and professional finish.
Step 2: Assemble the Cube Apply wood glue to the edges of one side piece and attach it to the bottom piece, ensuring it's square. Clamp the pieces together and pre-drill pilot holes to prevent the wood from splitting. Secure the pieces with screws. Repeat this process for the other side piece, top piece, and then the back piece. Make sure each piece is aligned and square before securing it with screws. Wipe away any excess glue with a damp cloth.
Step 3: Add the Back (Optional Front) If adding a back panel, apply wood glue to the edges of the frame and attach the back panel. Clamp it in place, pre-drill pilot holes, and secure with screws. If you want an open cube, skip this step. If you are adding a front panel (e.g., a door), assemble the cube without the back. The front panel can be added later with hinges or other mounting hardware.
Step 4: Sand and Fill Imperfections Once the glue has dried, remove the clamps. Sand the entire cube to smooth out any rough edges or uneven surfaces. Start with a coarser grit sandpaper (e.g., 120 grit) and gradually move to a finer grit (e.g., 220 grit) for a smooth finish. If there are any gaps or imperfections, use wood filler to fill them in. Allow the wood filler to dry completely, then sand it smooth.
Step 5: Finish the Cube Clean the cube with a tack cloth to remove any dust or debris. Apply your chosen finish, such as paint, stain, or varnish. If painting, apply a primer first for better adhesion and a more even finish. Apply multiple thin coats of your chosen finish, allowing each coat to dry completely before applying the next. Lightly sand between coats for an even smoother finish.
Step 6: (Optional) Add Doors or Shelves If you want to add doors to your cubes, install hinges on the door and the cube frame. Make sure the door aligns properly and swings smoothly. You can also add shelves inside the cubes by cutting pieces of wood to the desired size and securing them with shelf pins or screws.
Conclusion: Enjoy Your New Storage Cubes Congratulations! You've successfully built your own DIY storage cubes. Arrange them in your desired configuration to create a customized storage solution that perfectly fits your needs and style. These cubes are versatile and can be used in any room to organize books, toys, clothes, or any other items you want to keep tidy.
Ana White
 www.ana-white.com
 12 Cube Storage Organizer
www.walmart.com Diy Cube Storage Makeover
 tarynwhiteaker.com


0 komentar:
Posting Komentar