

 cutthewood.com ```html
 Introduction: Building Your Own DIY Workbench This guide will walk you through the process of building a sturdy and functional workbench. A good workbench is the foundation of any workshop, providing a stable surface for all your projects. This design is simple to build and can be customized to fit your specific needs and space.
Materials & Tools Needed: Before you begin, gather all the necessary materials and tools. This will make the building process smoother and more efficient.
- Lumber: 4x4 posts, 2x4 framing lumber, plywood or MDF for the workbench top and shelf (dimensions will vary based on desired size)
- Screws: Wood screws of various lengths (1 1/4", 2 1/2", 3")
- Wood glue
- Measuring tape
- Pencil
- Safety glasses
- Hearing protection
- Circular saw or hand saw
- Drill with drill bits and screw driving bits
- Clamps
- Sanding block or sander
- Level
- Optional: Wood stain or paint and sealant
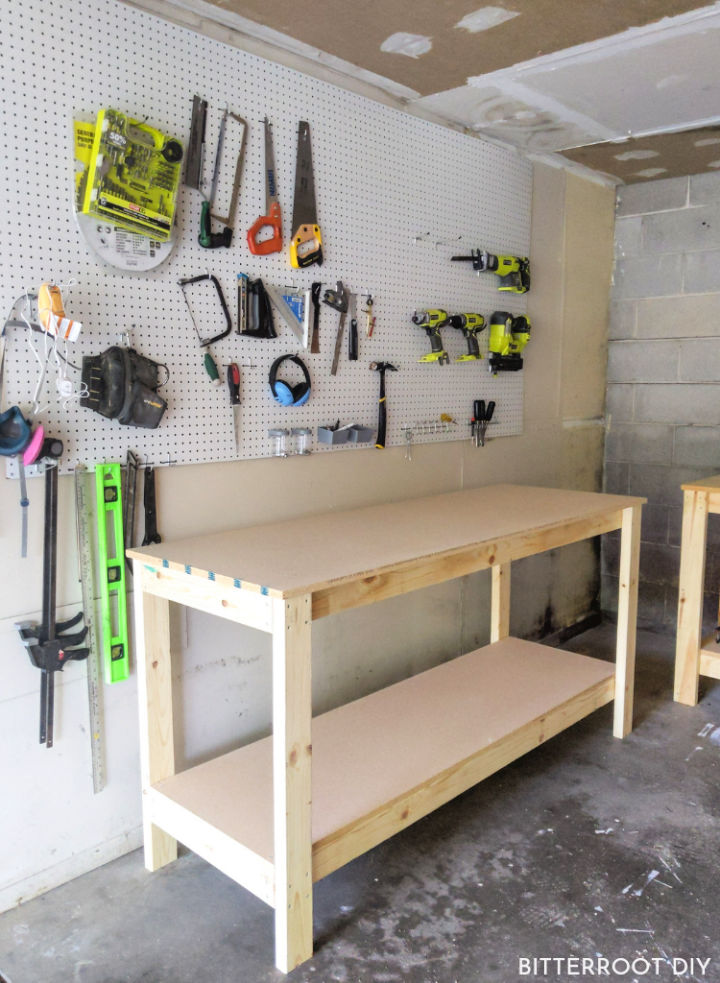
Step 1: Cut the Lumber Start by cutting all your lumber to the desired lengths according to your plan. A common size for a workbench is 6 feet long, 2 feet wide, and 3 feet tall, but adjust these measurements to suit your workspace. Cut the 4x4 posts for the legs, the 2x4s for the frame, and the plywood for the top and shelf. Double-check all measurements before cutting.
Step 2: Build the Frame Assemble the workbench frame using the 2x4 lumber. The frame consists of the top frame, the bottom frame, and the leg supports. Apply wood glue to the joints and secure them with screws. Ensure the frame is square by measuring the diagonals; they should be equal. Use clamps to hold the frame together while the glue dries.
Step 3: Attach the Legs Attach the 4x4 legs to the inside corners of the frame. Use wood glue and screws to securely fasten them. Make sure the legs are flush with the top of the frame. Use a level to ensure the legs are plumb (perfectly vertical).
Step 4: Add the Bottom Shelf Support Measure and cut 2x4s to create a frame for the bottom shelf. Attach this frame to the legs at your desired shelf height, typically about 1 foot from the ground. Use wood glue and screws to secure the shelf supports.
Step 5: Attach the Workbench Top Place the plywood or MDF workbench top onto the frame. Align it carefully and secure it with wood glue and screws. Ensure the top is flush with the frame all around.
Step 6: Add the Bottom Shelf Place the plywood or MDF shelf onto the bottom shelf supports. Secure it with wood glue and screws.
Step 7: Sanding and Finishing Sand all surfaces of the workbench to remove any sharp edges or splinters. Start with a coarse grit sandpaper and gradually move to a finer grit for a smooth finish. Apply wood stain or paint and sealant to protect the wood and enhance its appearance. Allow the finish to dry completely before using the workbench.
Conclusion: Enjoy Your New Workbench Congratulations! You've built your own DIY workbench. This sturdy and functional workbench will provide you with a reliable surface for all your woodworking and DIY projects. Remember to regularly inspect and maintain your workbench to ensure its longevity. You can add further customizations like a vise, drawers, or tool storage to make it even more functional for your specific needs.
``` 66 Workbench Diy Plans
cutthewood.com 30 Free Diy Workbench Plans And Designs
 blitsy.com
 19 Diy Workbench Plans • Insteading
 insteading.com


0 komentar:
Posting Komentar